![]()
by

New AD tools from V5.0 – see the changes.
From Stellar V5.0 (May 2021) the way AD recording is done has changed.
The previous AD Recorder Widget has been removed and all the functions previously found in the Widget have moved to other locations.
If you load a Layout you will see this message in the AD Recorder Widget:
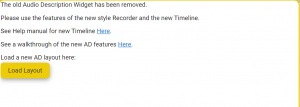
Please load a new AD Layout from the System/AD section in Layouts- See here for how to Load a Layout
You will see a Layout like this:
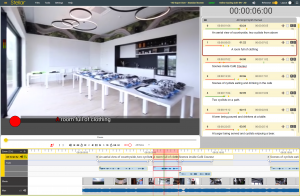
This section explains the changes:
Moving between Titles
- To move between Titles to record you have a range of methods:
- Use Alt+ Page Up and Down to step through the Titles with video
- Double Click on a Title box on the timeline
- Use Alt+ Drag on the timeline to move video and titles in sync
- Each Title will be selected in turn and the Title will be marked in Red on the timeline.
- This shows the section timed section that will be recorded.
AD Script Text Display
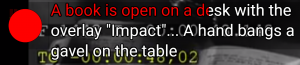
- The text to read for each title is now shown in the video display.
- You can configure this to be either over or under the video image.
- See the Audio Text Overlay Widget for full configuration details.
- You can set up the countdown indicator as either a pie chart, a digital display or a moving bar.
Record Button
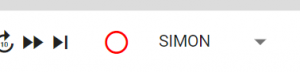
- The Record button has moved to the media control bar, along with al the other control buttons.
- The button will be Red if recording is enabled
- To enable recording make sure you have a Title selected and the script file is not Read only.
- You can also use Alt+D or F12 to start and stop recording
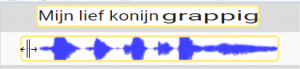
View of recoded audio.
- Every audio you record is now displayed on the Timeline
- It is possible to Hide and Reveal the audios for an AD file on the timeline. See the Timeline Widget for full details.
-

- You can record more than one Take for each Title and these will be stacked below the Title on the timeline.
- Each Take can be Muted, Unmuted or Deleted
- Hover over the waveform with the mouse point to see pop up controls
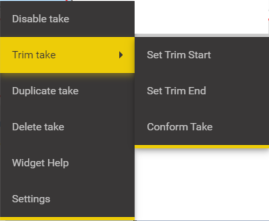
- Right click on the waveform to see more options
- Each Take can be Muted, Unmuted or Deleted

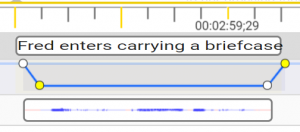
Trim or Move an audio Take.
- Each Take can be trimmed and moved on the timeline.
- All times are relative to the Title (text) box.
- If you more the tTitle box, all audios will move with it.

- Use Shift + drag on the middle part of a waveform to move it left or right on the timeline
- Use Shift+ Drag on either end to trim the audio Take.
- Note: When the audio is recorded there is a bit of’ extra’ audio on each end that you can reveal by moving the end trim.
- Hint: You will hear an audio scrub of the audio as you trim the ends, this helps align the trim marks correctly
Edit Fade settings for a Take
- The Fade waveform has moved to the Timeline
- Each Title (text) box has an associated Fade waveform.
- Use Shift+ Drag on one of the handles to set the fade points and fade level.
- Hover over the Title box to see the Set Default Fade control
- Right click on the Fade waveform for more options.
Use a Synthetic Voice
- The Synthetic Voice button has moved to the media control area, along with all the other media control buttons.

- Right Click on the control to select the voice and set the voice parameters.
- Now doing a Ctrl+ Click on the button will create a new audio Take with the synthetic voice for the selected Title
- Hint: To speak more than one Title at a time right click on the button and use the Render All or Render missing titles options.
- See the Synthetic Voice Plugin for more details.